Real Estate Virtual Tour Software: Choose and Build the Right Tour
Choose a property-tour format, evaluate the software, and take a real estate tour from capture through buyer-ready delivery.
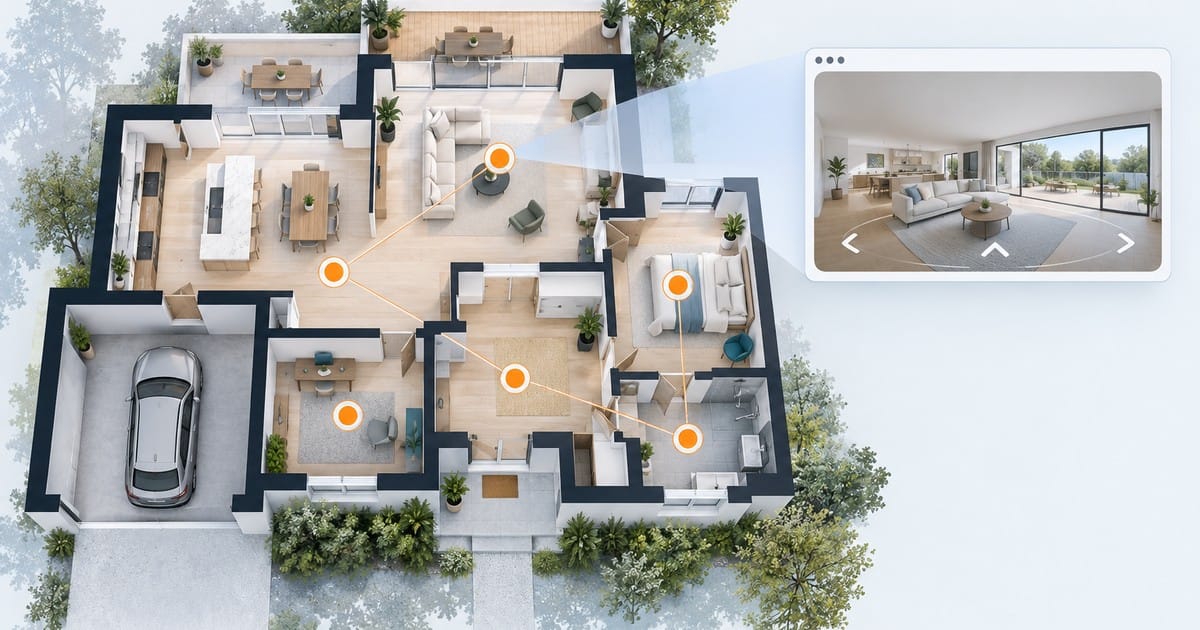
Real estate virtual tour software helps you turn property imagery into an experience buyers can explore remotely. The right choice starts with the output your listing needs. A linked set of 360 panoramas, a video walkthrough, a depth-aware 3D model and a floor plan answer different questions. They also require different capture files, editing steps and delivery checks.
Start with where the finished tour must appear. A tour that works on your own website may need a different link or media format for an MLS or property portal. This guide gives agents, property marketers and 360 photographers a way to choose the output, test the software and review the finished tour before sharing it.
What counts as a real estate virtual tour?
A virtual tour lets someone inspect a property without being there. In an interactive 360 tour, the viewer can turn within a panoramic scene and move through linked viewpoints. A video follows the route the producer chose. A 3D model may add spatial relationships or measurements when its capture and processing support them. A floor plan shows room layout, sometimes linked to photographs or tour positions.
These outputs are related, but the files are not interchangeable. A conventional panoramic photo does not automatically become a measured 3D model. A sequence of still photos does not acquire navigable connections simply because the images were stitched. When you assess a product, ask to see an example of the specific output the buyer will receive. Matterport's explanation of 3D and 360 formats and Zillow's 3D Home page illustrate distinct vendor approaches; their features should not be attributed to every tour platform.
| Output | What to plan and check |
|---|---|
| Linked 360 panoramas | Buyer: Look around and move between connected scenes. Prepare: Captured panoramas, scene links and navigation review. Check: Confirm that a hosted link or embed is accepted where the listing will appear. |
| Video walkthrough | Buyer: Watch a guided route at the producer's pace. Prepare: Recorded footage, edit and export. Check: Check the destination's video dimensions, length and upload rules. |
| Depth-aware 3D model | Buyer: Explore a spatial representation where the product supports it. Prepare: Compatible capture and model processing. Check: Check the viewer, measurement claims and share format for that product. |
| Interactive floor plan | Buyer: Understand room relationships and, in some products, jump to associated media. Prepare: A floor-plan production path and any required capture hardware. Check: Check how the plan displays alongside the listing's other media. |
The US National Association of REALTORS' 2025 Home Buyers and Sellers Generational Trends report asked recent primary-residence buyers who used the internet which website features they found very useful. Photos scored 83%, detailed property information 79%, floor plans 57% and virtual tours 41% (exhibit 3-6; purchases from July 2023 to June 2024). These are survey ratings, not measured effects on inquiries or sales. A useful tour sits within a fuller listing presentation.
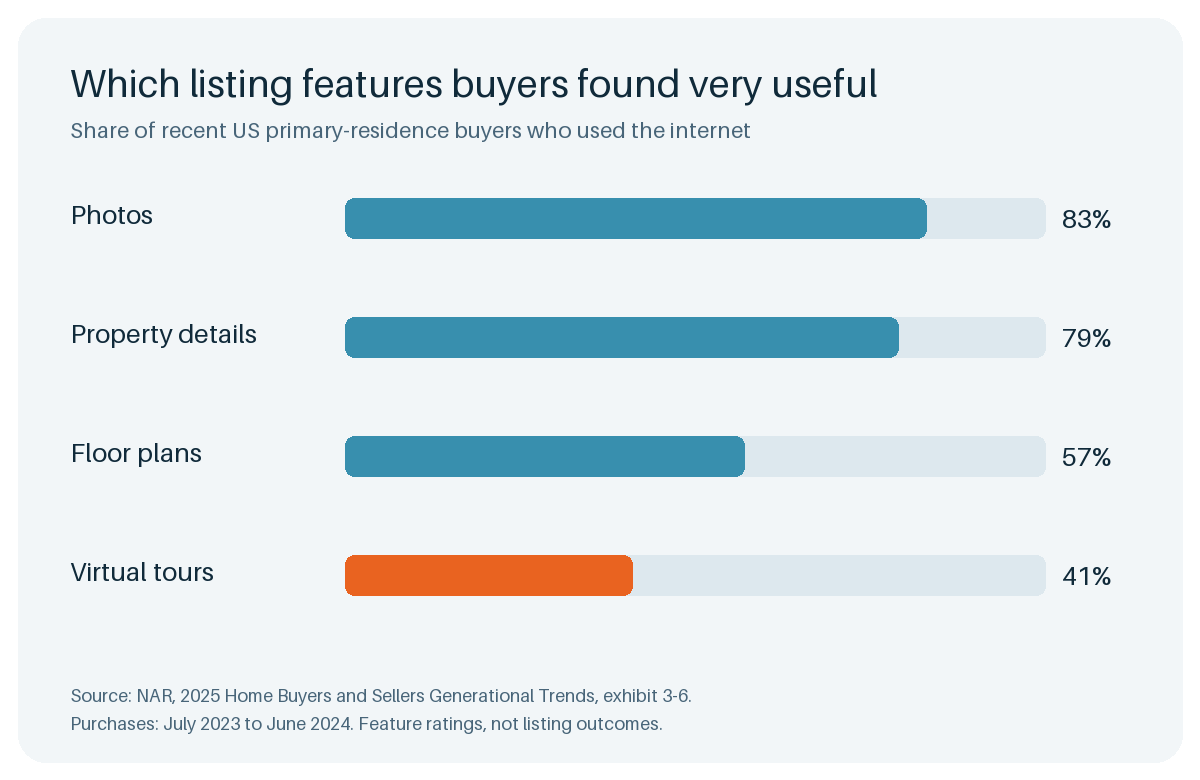
Source: NAR, 2025 Home Buyers and Sellers Generational Trends, exhibit 3-6. Shares of recent US primary-residence buyers who used the internet who rated each feature very useful. Purchase window: July 2023 to June 2024. The chart shows preferences, not listing outcomes.
Choose the output before choosing software
Write down the listing's delivery destination and the buyer's task before looking at feature lists. If a remote buyer needs to see the route from the entrance to the bedrooms, a navigable 360 tour may be useful. If the job is to show the pace and atmosphere of a walkthrough, video may fit. If the buyer needs reliable dimensions, request a product and capture method that explicitly supports them; don't infer measurements from a panorama. If layout is the sticking point, plan for a floor plan as a separate deliverable or a verified floor-plan feature.
An agent who owns the property page can test a tour link or embed there. An MLS or portal is another gate: accepted media, link rules, branding policies and display behavior vary. Ask the actual destination for its current rules before paying for production. A social clip can point to a fuller tour, but a clip is a different asset. Google Street View is also a separate publishing decision. A listing tour does not need to be submitted to Google Maps to be useful on an agent's website.
Zillow's 2026 Consumer Housing Trends buyer report found that 69% of its surveyed buyers somewhat or completely agreed that 3D tours help them get a better feel for a space than static photos. Only 30% said they prefer 3D tours over in-person viewings. The survey concerns attitudes toward 3D tours, not the performance of GoThru or every 360 format. Use a remote tour to help buyers decide whether to visit, with the property visit still available when needed.
Evaluate software across the whole property-tour job
A convincing demo is useful, but test what happens before and after the viewer opens. Ask each vendor for a sample made with the files and devices you intend to use. Then work through these checks with a small, permitted test property.
- Inputs and capture fit. Which panorama, video or depth formats are accepted? Does the workflow need a compatible camera, mobile app or desktop processing step? What happens when a source image has a visible seam or uneven exposure?
- Tour assembly. Can you connect the right viewpoints, handle transitions through doors and stairs, group floors and make the starting view understandable? Test a backtrack as well as the intended route.
- Viewer and privacy. Open the tour on a phone and a desktop browser. Check loading, touch navigation, floor transitions and any visible faces, family photos, documents or reflective surfaces before the link leaves your control.
- Delivery. Test the actual hosted URL, the embed if one is offered, and any export you need. An export option and continuing hosted-link access may have different terms. Check link behavior after a plan changes or a project is archived.
- Team and ownership. If multiple people edit or hand off tours, ask who can access the source images, review changes and manage the final link. Confirm current permissions, support and plan limits in the vendor's documentation or account before making a commitment.
Treat the answers as a test record, not a score invented from marketing copy. Note the camera and input files, each step performed, the destination tested, the observed result and the plan under which you tested it. For a vendor shortlist, consult the dedicated software comparison for real estate agents and verify each provider's current terms before deciding.
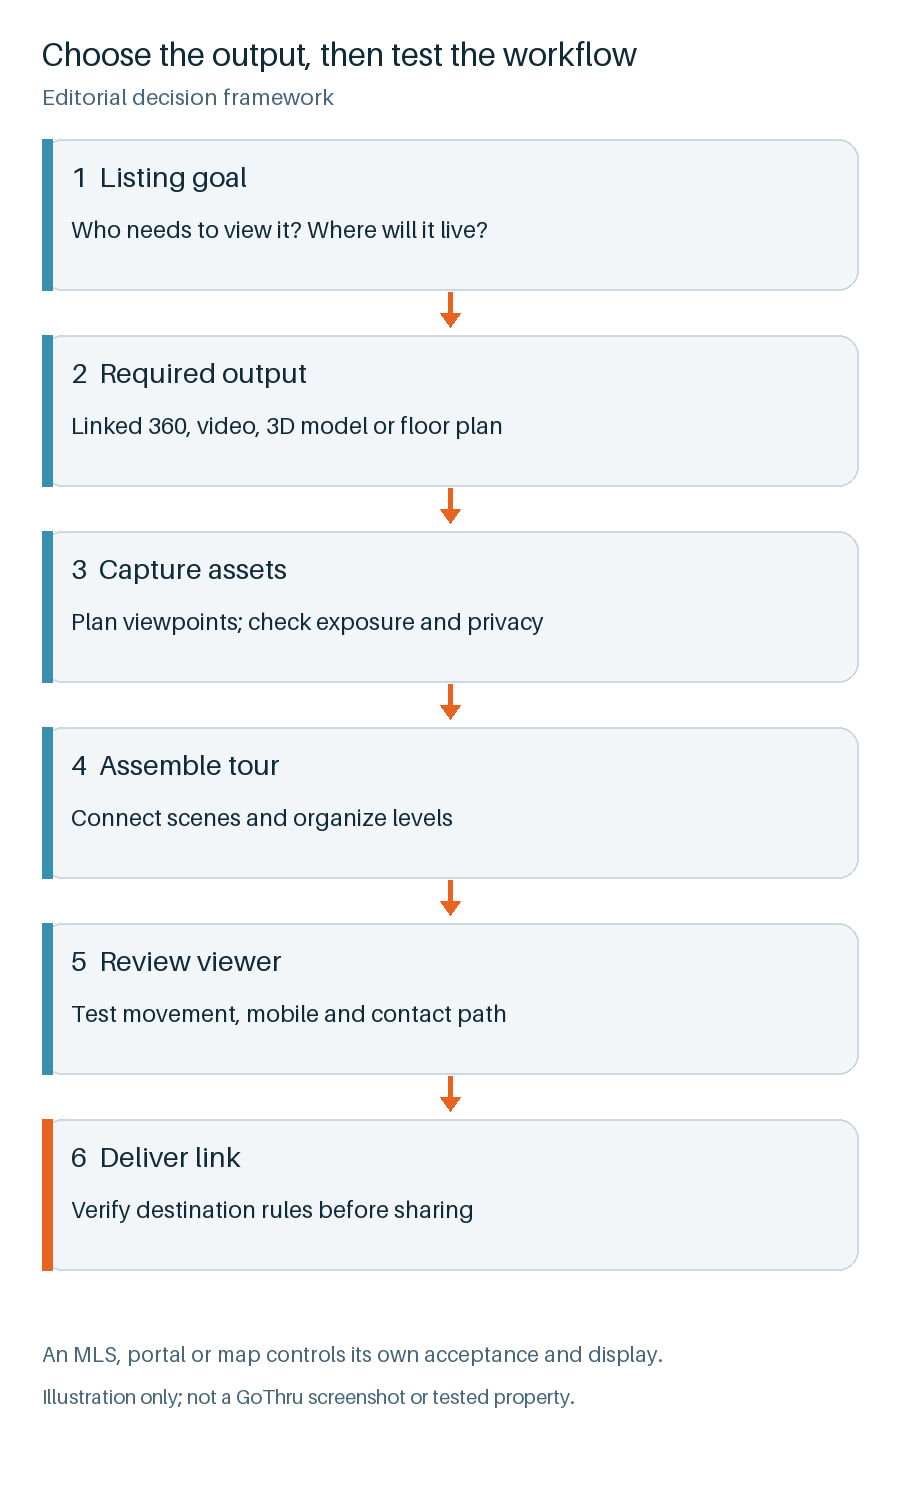
An editorial decision framework, not a product screenshot or a measured performance funnel. Each destination controls its own acceptance and display.
Plan the capture and prepare the images
A tour is easier to navigate when capture positions reflect the way a visitor would walk. Sketch the entrance, main rooms, hallways, doors and stairs. Place viewpoints where the next move will be clear, including on both sides of a difficult doorway. Give each floor its own sequence and plan a clear transition between floors.
Before capture, confirm that the property owner permits the shoot and the intended uses. Stage only with permission. Check lighting, camera height and level, reflections, mirrors, personal information and anything visible outside a window. A tidy tour can still reveal a document on a counter or a family photograph. Review the original panoramas for seams, exposure differences and blur before you assemble them. Correcting a source image is a different job from connecting tour scenes.
For one documented production path, GoThru's Insta360 and Street Editor property-tour guide covers capture positions, levels and upload. The longer property-capture demonstration shows doorway viewpoints and a second level. Its title mentions the Insta360 X5, but the presenter uses an X4 in the demonstration. The camera and app sequence is an example, not a universal requirement for every camera. Confirm current controls and eligible devices against your own account when producing a tour.
Build and review the tour
With suitable panoramas ready, assemble the scene path and inspect it as a visitor would. Put a useful orientation view first. Connect the entrance to the first interior scene, then move through adjacent rooms in a plausible order.
In GoThru's documented moderator workflow, you place the first panorama in the main viewer, add the neighboring panorama, and compare their alignment. Auto Link can propose a connection where available; review the route on the map and correct it manually if needed. Test branches, backtracking and floor transitions before saving. A connection can exist technically yet still send the viewer to an unexpected position.
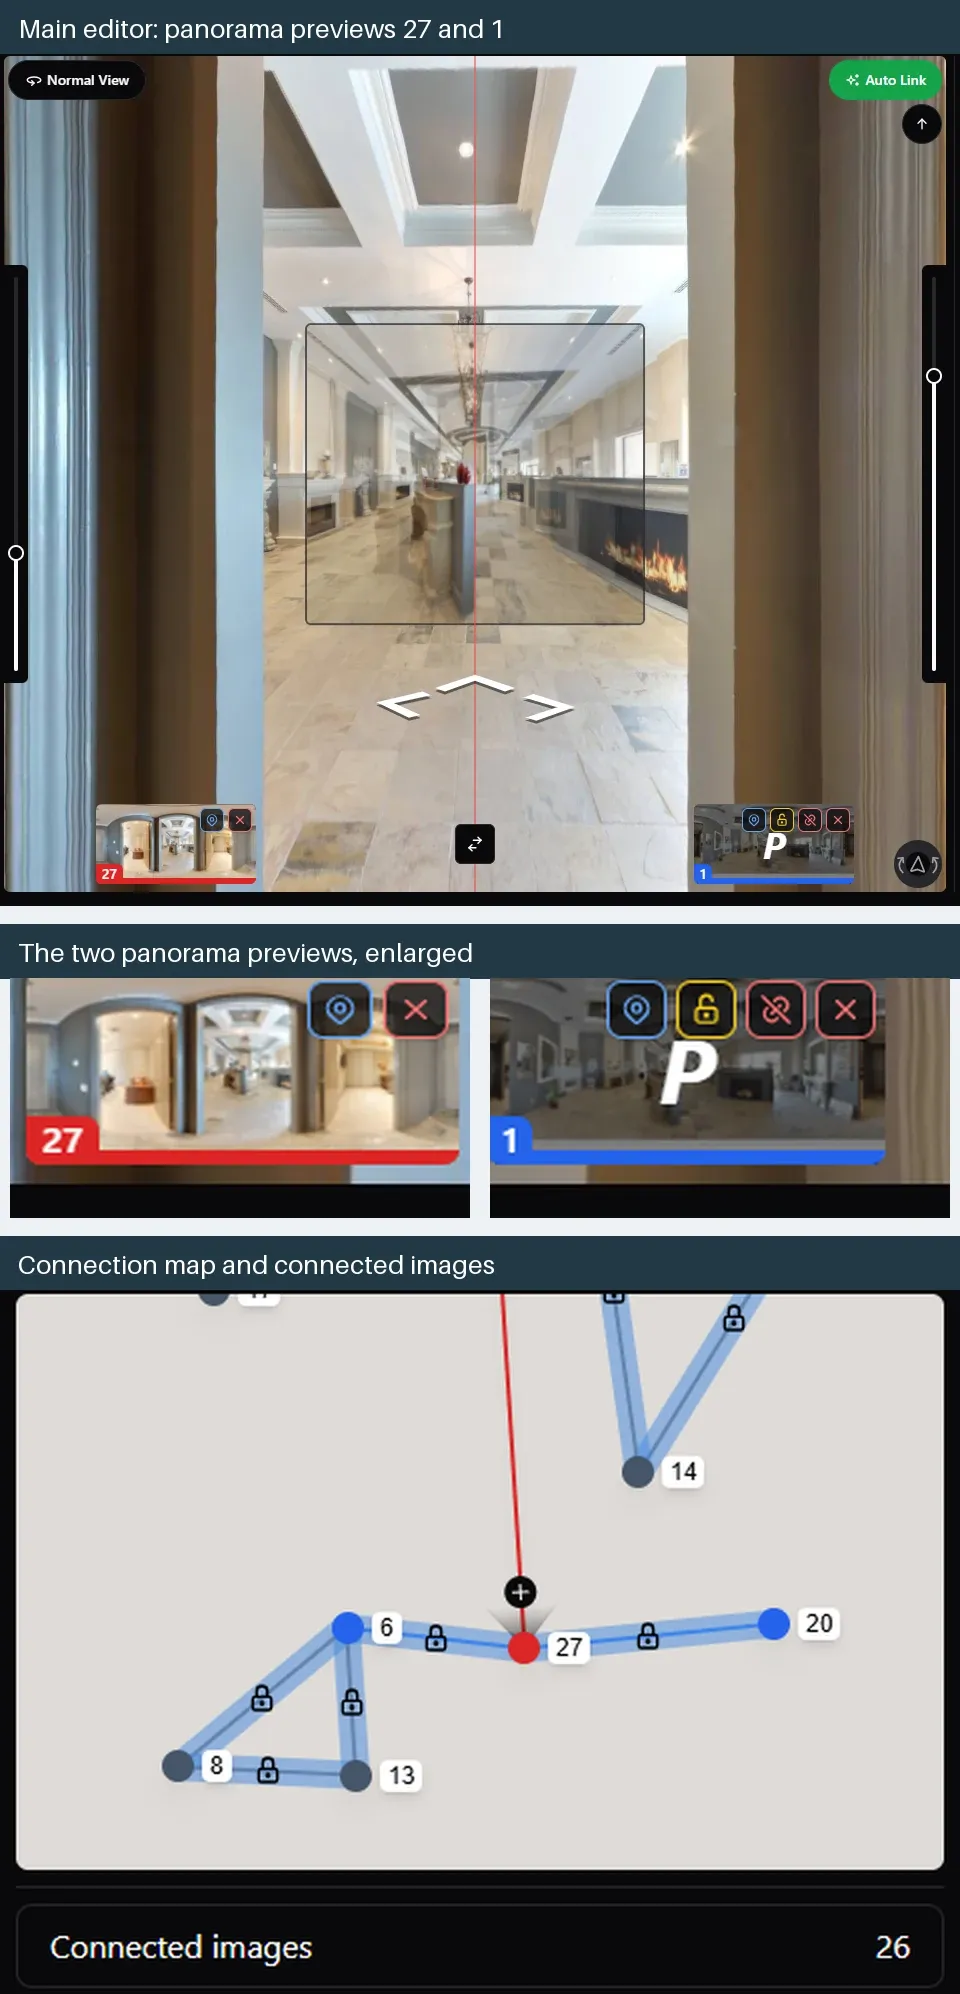
The main editor shows panorama previews 27 and 1 beneath the viewer. The map shows the selected viewpoint and nearby connections. Use the numbered views to check the route in your own tour.
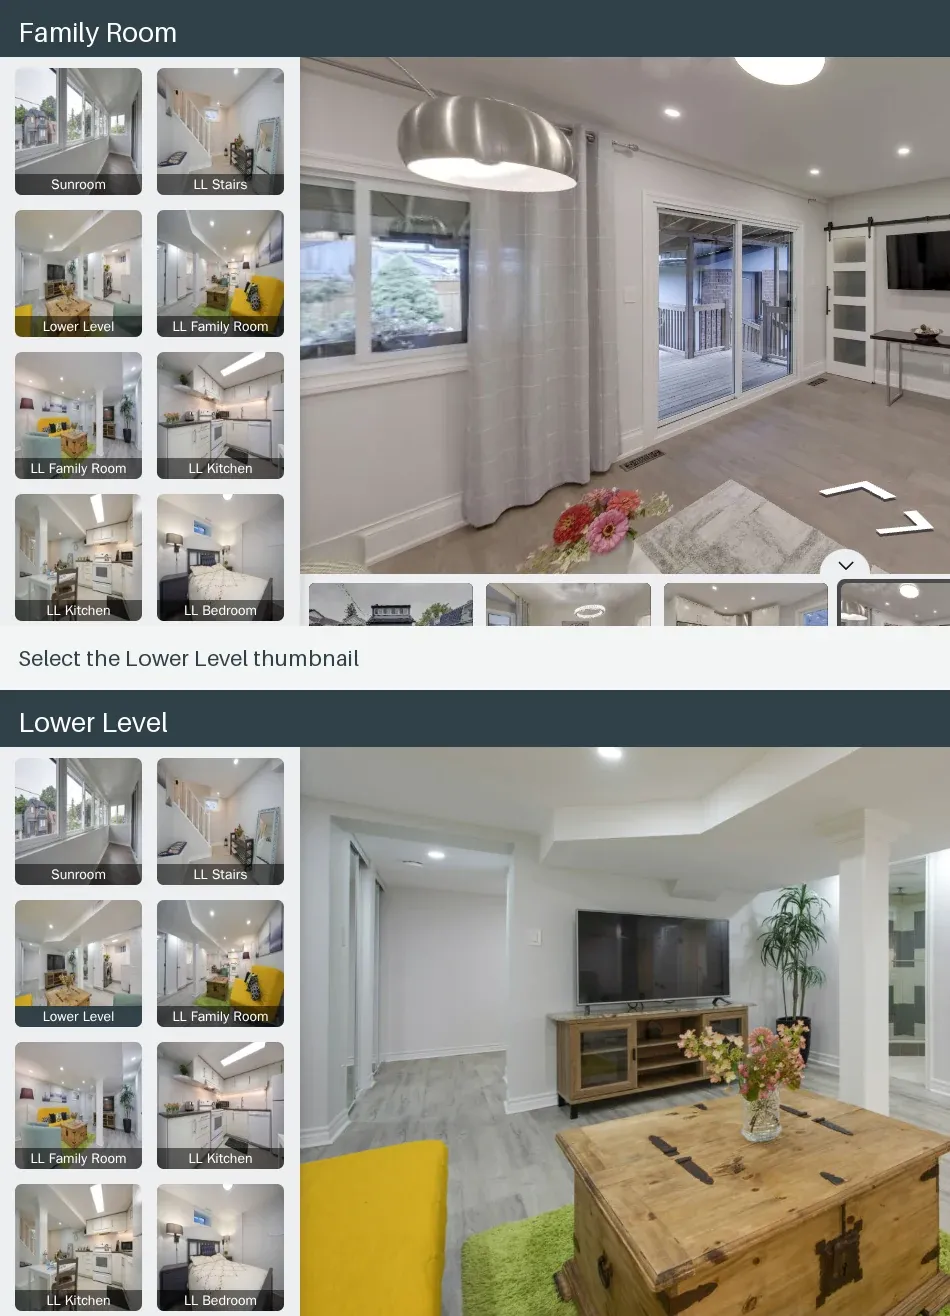
In this sample property tour, the Lower Level gallery thumbnail opens lower-level media from the Family Room view. Check the route back as well. The gallery is not a dedicated floor selector; listing details have been cropped out.
Watch GoThru's real-estate tour demonstration for an example of the assembly steps. It shows panorama upload, room-label review, opening-view and scene-order choices, and a hosted-tour preview. Compare those choices with your own test property and check the controls available in your account.
GoThru's Virtual Tour Creator adds a navigation layer to panoramic images and shows real-estate tour examples. Its product page describes menu and carousel options. If these controls matter to your tour, check their current availability in your account. The real-estate tour creation guide covers the hands-on production path in more detail.
Review the draft tour in a private or owner-approved context. On mobile, can someone turn, advance and recover if they take a wrong branch? Does every intended room appear? Check the image at full resolution for personal details. Test the final viewer with a colleague who has not seen the capture plan; ask them to find the kitchen and return to the entrance. Record where they hesitate and repair that part of the route.
Deliver the tour where buyers can use it
A finished link is only one part of delivery. Open it in an incognito window and on a phone without your editing session. Check the first scene, media loading, room navigation, privacy and a clear way back to the listing's contact information. If you embed the tour on an owned page, test the page on narrow screens and ensure the tour does not cover the listing details.
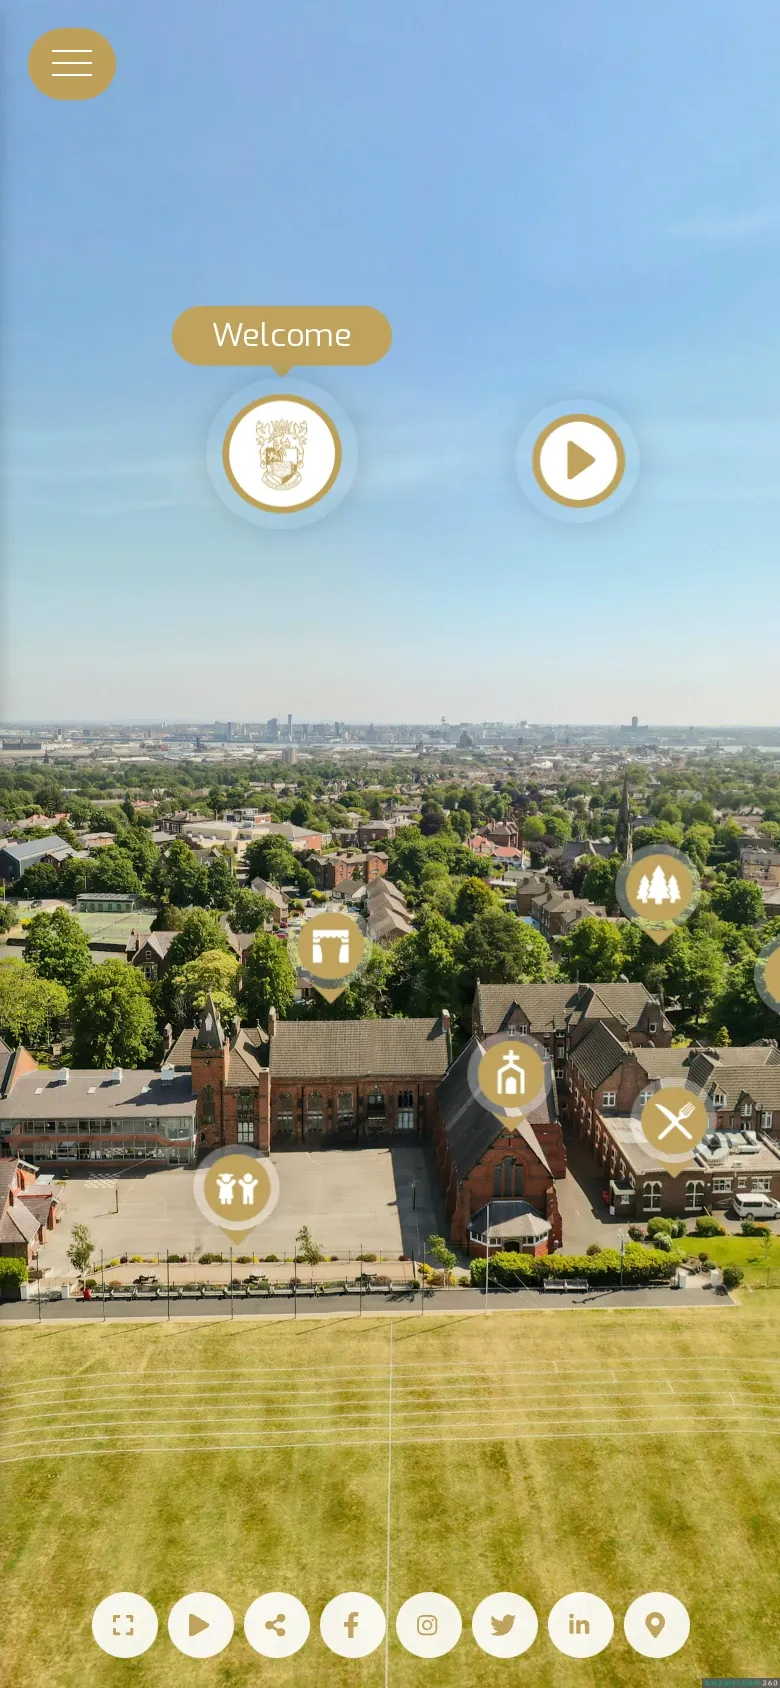
Mobile viewer example from the Birkenhead School virtual tour (Chameleon 360). It illustrates navigation on a phone, not a residential listing.
For a portal or MLS, submit only the media type and link it currently permits. The portal may reject a branded link, strip an embed or change where media appears. Do not assume that a tour visible on your website will appear the same way after syndication. Save a copy of the accepted destination requirements and verify the live listing after it processes your submission. If a social post uses a short video excerpt, link back to the buyer-ready tour where the platform permits it.
Google Street View is a separate route for appropriate locations and use cases. It should not be confused with a private property's listing tour or with a guaranteed Google Maps result. Decide whether it belongs in the project at all, then follow the current platform-specific instructions and check what appears after review.
Match the workflow to the property
An occupied listing can require tighter scheduling and privacy review than a vacant property. A rental team producing many units may care more about repeatable capture naming, floor consistency and link maintenance across vacancies. A commercial property may need a deliberate route through multiple zones and a buyer or tenant contact path suited to its use. The commercial property tour article explores that adjacent setting.
Research is more nuanced than the familiar claim that every tour increases price or cuts days on market. Anderson, Freybote and Manis analyzed 34,359 single-family MLS transactions from three US regions in 2019. Their modeled relationship between virtual-tour use and sale price differed across occupancy and price segments, and they could not determine when each tour became available on a listing. That observational study does not measure GoThru and cannot promise a result for a particular property. The practical lesson is to plan a tour for the listing's specific constraints, then measure outcomes in your own workflow.
Test one property before committing to a platform
Choose a property you have permission to use, ideally one with a doorway transition and more than one kind of room. Decide its buyer task and destination in advance. Keep the source files and record the time required for capture, preparation, tour connection, review and delivery. Note which steps depended on a particular camera, app or paid plan.
Share the draft only with approved reviewers. Ask one person unfamiliar with the building to find a specified room on a phone. Try the hosted link and any intended embed or approved portal route. Record broken paths, slow or missing media, privacy fixes and any link-access limitation. Re-test after repairs. A successful internal test establishes that this one tour works under these conditions; it does not establish a universal time saving or sales uplift.
If a navigable panorama tour fits your listing, explore GoThru Virtual Tour Creator and compare its current workflow with your capture files and delivery destination. Check the plan and final viewer using an approved test property before deciding.