
How to upload 360 photos to Google Maps without a business listing
Use a GoThru no-listing project to position and connect 360 JPGs at a location, submit the tour to Street View, and check the result on Google Maps. These steps are for connected still photos. If you have just one Photo Sphere for an existing Maps place, use Google's Maps contribution instructions. The broader Google tour guide covers other publishing routes.
Prepare your 360 images and Google account
- Prepare stitched, equirectangular JPG panoramas. Check focus, exposure, the horizon, stitching seams, and any private details. Keep the source files.
- For this GoThru workflow, prepare JPGs at least 5,300 × 2,650 pixels. Check your project upload screen before resizing a batch. Google's general Photo Sphere requirements are different: at least 3,840 × 1,920 pixels, a 2:1 aspect ratio, and no more than 75 MB per image.
- Sign in to GoThru and connect the Google account you intend to use for Street View publishing. Use images you have permission to publish at the chosen location. Coordinates alone do not guarantee that Google will display them.
Create a tour without a business listing
- In the GoThru dashboard, choose Create New Tour.
- Choose the option for publishing 360 images without a business listing. Do not select a business page or PlaceID for this project.
- Enter the latitude and longitude of the capture location. Check that the map pin matches the place where you took the photos.
- Open the new project and confirm its location before uploading. Correct a misplaced pin now rather than trying to compensate for it when connecting panoramas.
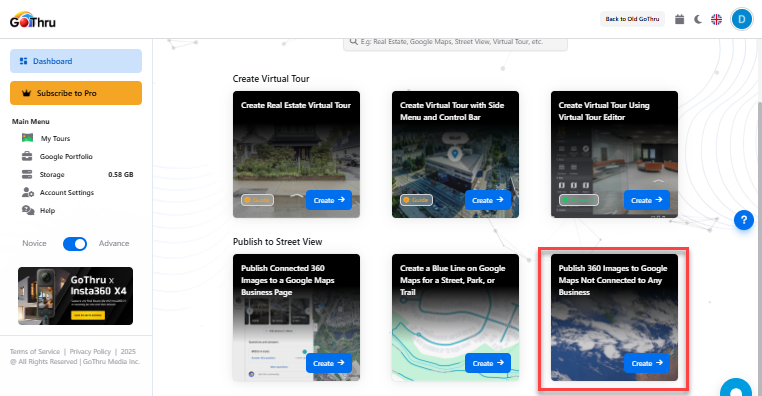
No-business-listing project option.
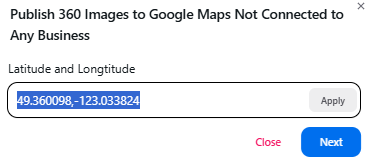
Latitude and longitude entry.
Upload the JPG panoramas
- Choose Browse Files in the project upload area, or drag the prepared JPGs onto the upload target.
- Wait for upload confirmation. Compare the uploaded panorama count with your source folder and check that the expected images appear.
- If your project offers Google Drive or Dropbox import, you can use either instead of direct file selection. Check the imported files in the same way.
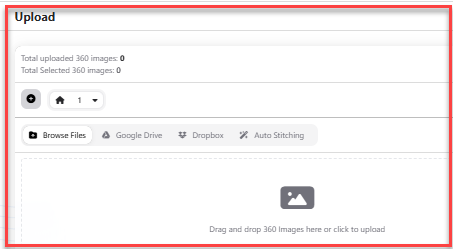
JPG upload options.
Place and connect the panoramas
- Open the 360 Image Connector and choose a starting panorama.
- Place the panoramas along the captured path on the map. Keep nearby views in the right order and position.
- Use Auto Link if it produces useful connections. Open each link to check the navigation arrow and view direction.
- Fix links that point through a wall, skip a stop, or face the wrong way. Save the connections after reviewing the full route.
The AI Moderator connection guide explains Auto Link and manual adjustments in more detail.
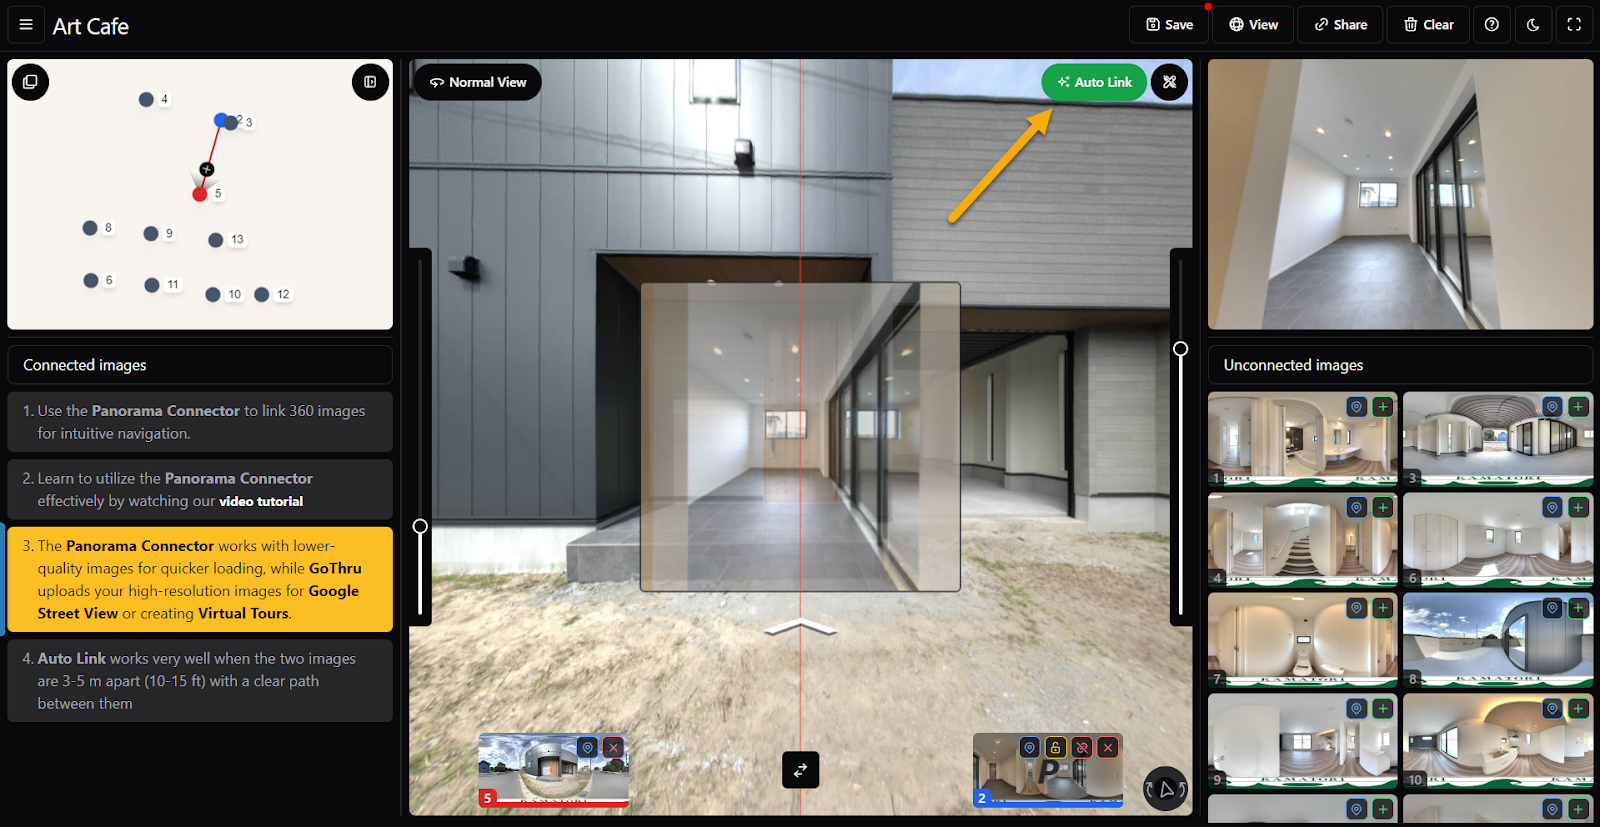
Panorama positions and connections.
Review privacy and preview the route
- Open each panorama and inspect faces, license plates, and other details that should be obscured.
- Use Apply AI Blur where appropriate, or make manual blur selections in the 360 Image Connector. Follow the blur instructions for the controls and processing steps.
- Reopen the processed images. Confirm that each intended area is actually blurred and inspect for anything the automatic pass missed.
- Save the changes before submitting the tour.
Preview the route
- Open Preview in the project after saving the connections and privacy edits.
- Start at the intended first panorama. Follow every navigation arrow forward and back.
- Check each panorama's position and orientation. Return to the 360 Image Connector to correct a broken connection, then preview again.
Preview checks your GoThru project. It does not show whether Google Maps has accepted the tour.
Submit to Street View and check the public result
- Open the project's Street View publishing screen and select the intended Google account.
- Review the selected panoramas and their positions. Leave business-listing and PlaceID options unused for this coordinate-based project.
- Use Publish to submit and note the confirmation or status shown in GoThru. Keep the project and source files in case a correction is needed.

Account selection and Publish control.
Check the tour on Google Maps
Submission does not mean the tour is visible on Google Maps.
- Check the project's processing or publishing status after submission.
- Open the intended location on public Google Maps and look for the contributed imagery.
- Open a panorama and follow its connections. Check the location, starting view, and navigation against your GoThru preview.
- If the imagery is missing or a link is wrong, review the project status, connected Google account, coordinates, image quality, and any content-policy notice. Correct the affected panorama or connection in GoThru, then repeat the review and submission steps as needed.
Google says to allow up to four days for linked Photo Spheres to be processed. That is processing guidance, not a guarantee that an image will be accepted or displayed by a deadline.
If you need to publish to an existing business listing, use the business-listing guide. An outdoor blue line has a separate individual-panorama workflow; it is not the expected result of this no-listing tour.