How to work with GoThru AI moderator
GoThru's AI Moderator provides an innovative solution to streamline and enhance the virtual tour moderation process. This tutorial will walk you through everything you need to know to effectively utilize the power of AI to connect your images.
Let's dive in the moderation process using GoThru's AI Moderator:
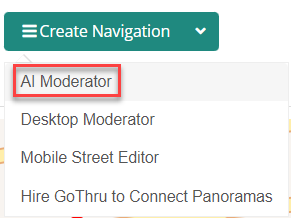
- In the Tools screen, select "Create Navigation" and select AI moderator.
2. AI Moderator has the following structure:
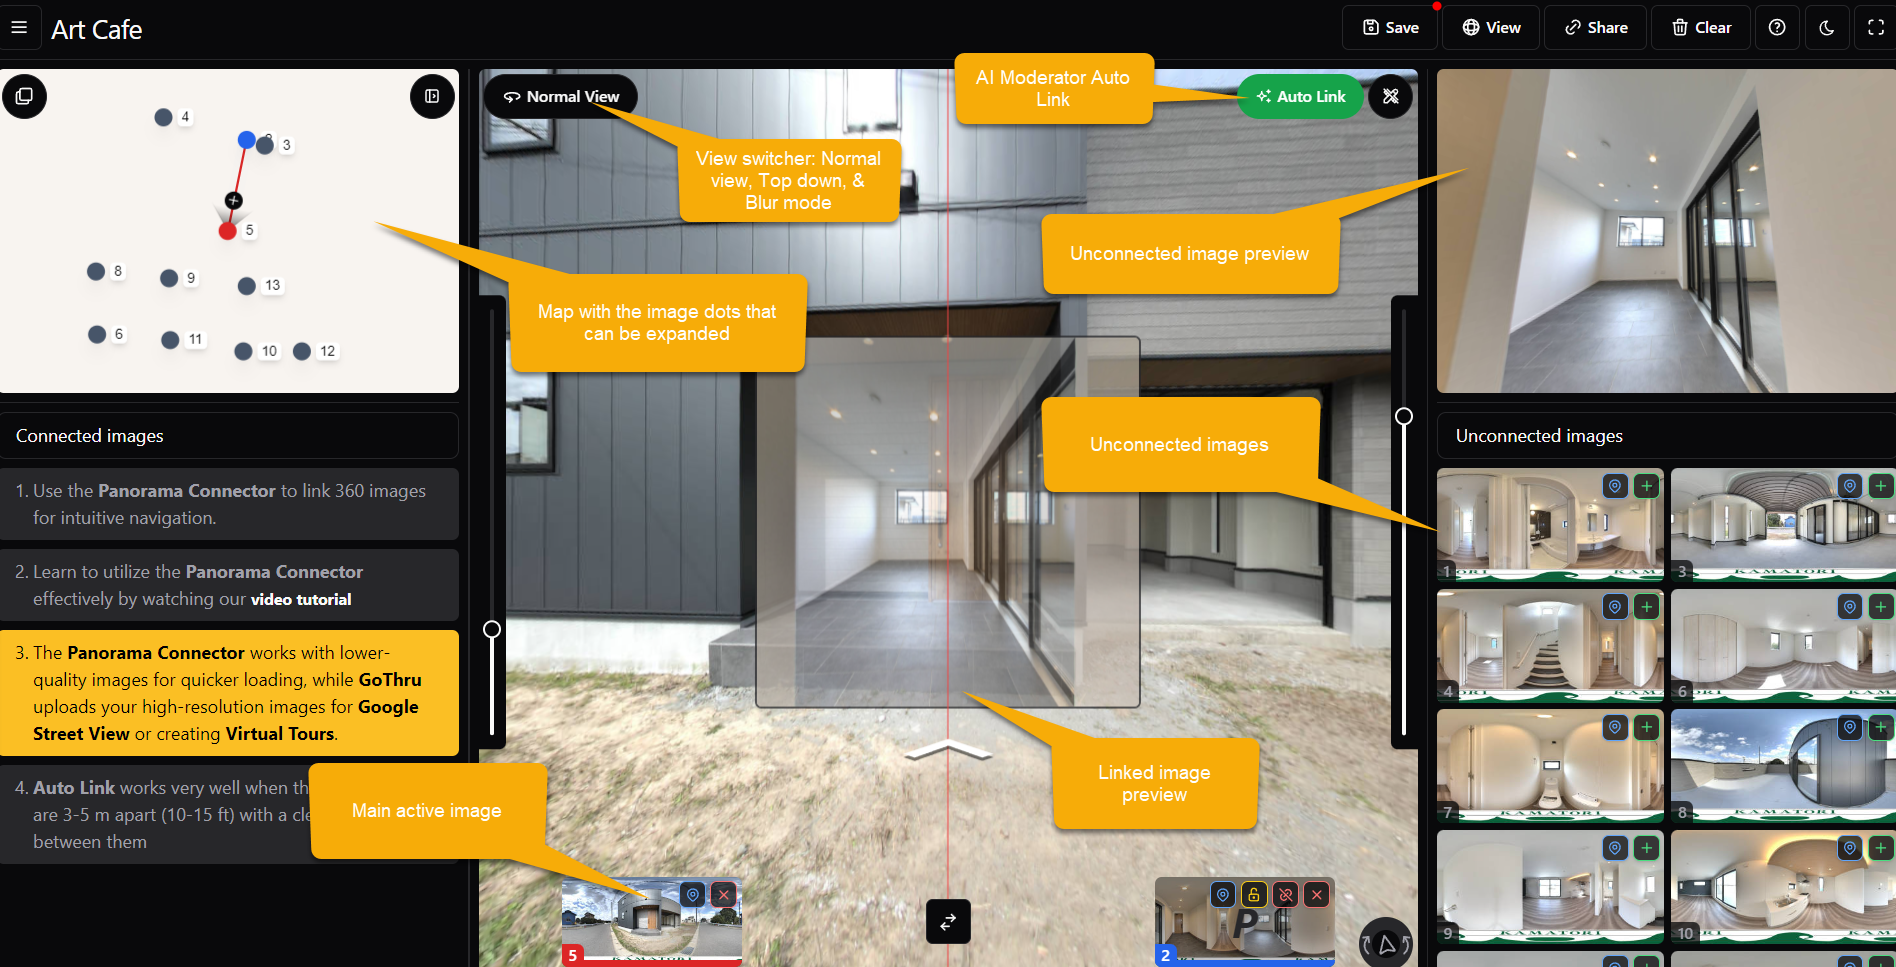
- Unconnected images - On the lower right corner you can find the list of unlinked panoramas. Once connected, they will move to the list from the lower left corner.
- Preview Window - On the top right corner there is the Preview window.
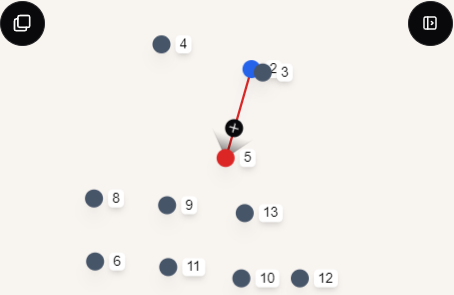
- Map - On the upper left corner there’s a map containing the numbered panoramas displayed as dots.
- Preview of the link - The center of the Moderator is occupied by a preview of the link for the selected image.
- Active Panoramas - On the lower side there are the thumbnails for the active panoramas in the Moderator.
- Connected Panoramas - On the lower bottom left you can see the panoramas that have been connected.
- Auto Link - At top right corner is the most powerful button of the new AI Moderator that automatically detects and connects images.
- View Switcher - Next to the map, you can change the view from normal view, top down and blur.

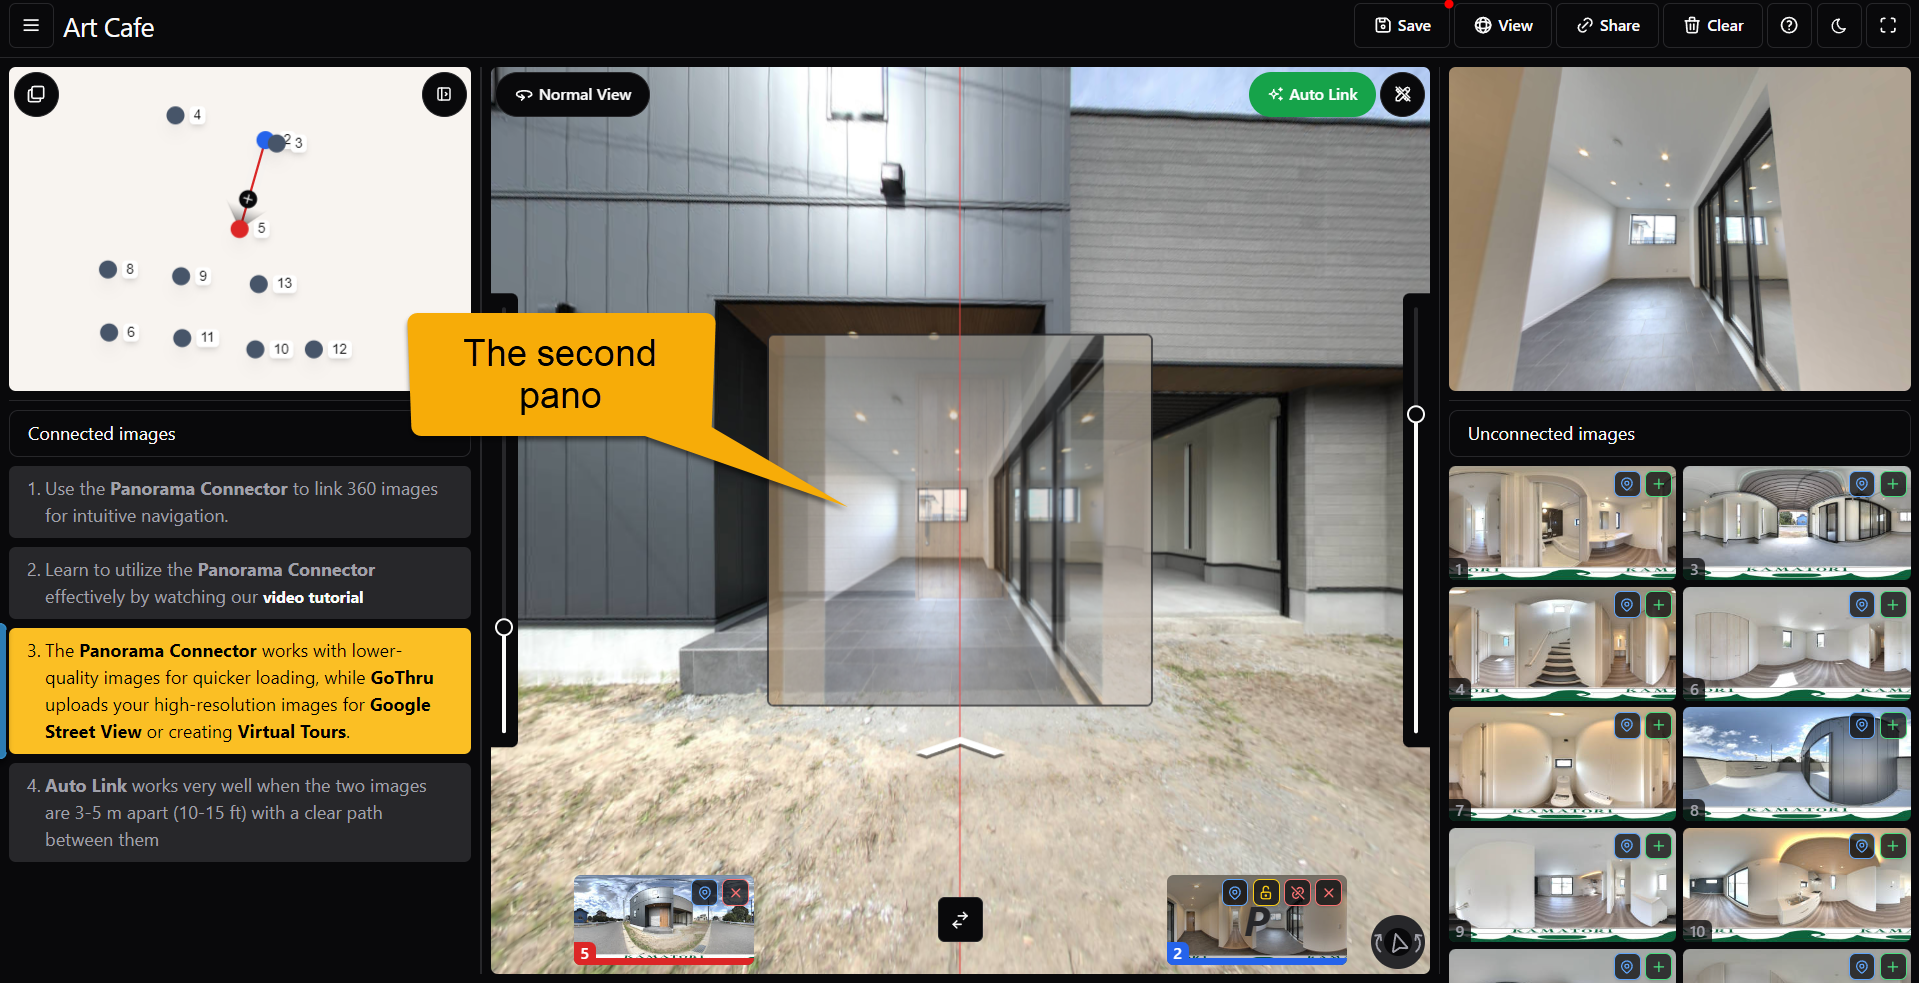
3. In the moderator, double-click on the first panorama or drag it to the Main box.
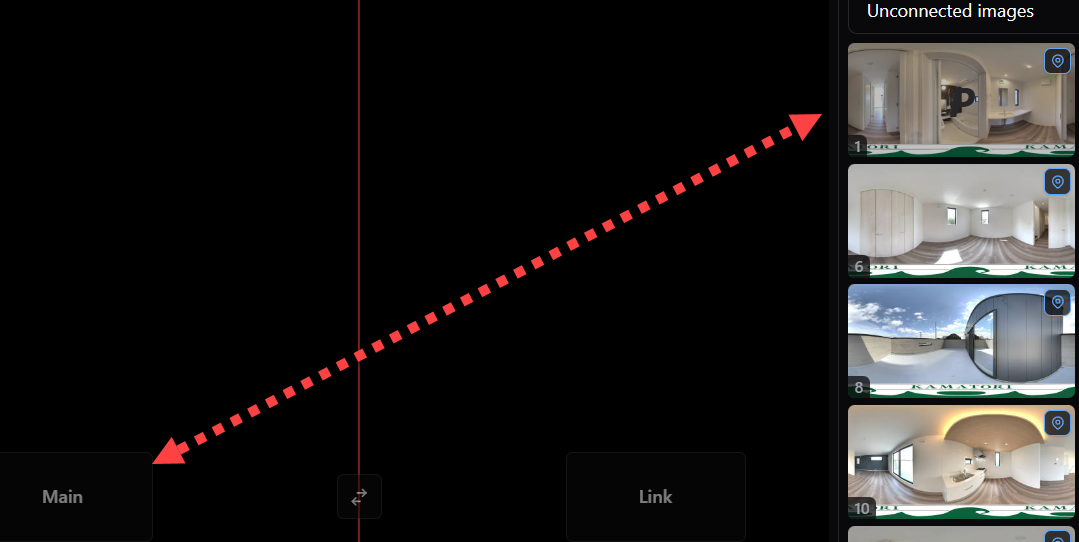
4. Drag or double-click on the next panorama and it will be placed in the middle of the center line. You can also click on the + icon over the unconnected images.
5. This is the moment when the AI Moderator begins its work. Press Auto Link. By selecting the Auto Link, you enable the system to automatically detect and connect related images based on their spatial and contextual relevance.
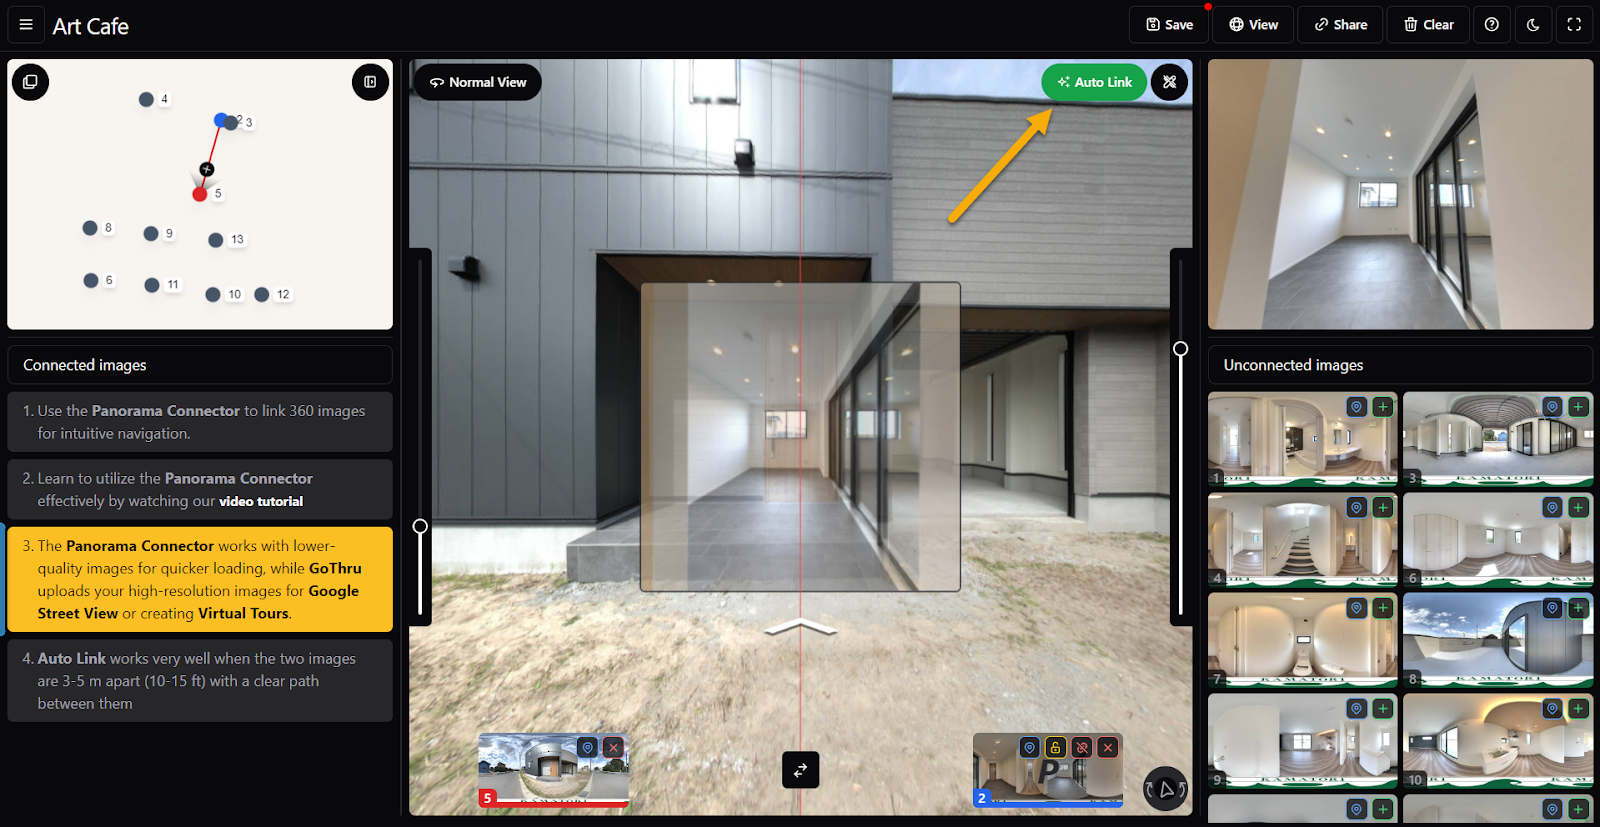
Auto Link performs exceptionally well when the images are spaced 3-5 meters (10-15 feet) apart, provided there is a clear path between them. This optimal distance ensures that the AI can accurately identify and connect the images.
6. You'll notice that moderator has automatically created a link between the first and second panoramas on the map.
Note: You can use the Up and Down arrows on the image to switch between views and ensure a good connection between panoramas. Scrolling the mouse will zoom in/out of the panorama, affecting the map's panorama distance.
7. To visually verify the link, press the arrow and the "F" key (F=flip).

8. If Auto Link fails to connect the images correctly, you can use the manual connection tool to align them precisely where needed.
At times, the AI that connects images encounters difficulties when there are white walls in the images. In such cases, the manual connection tool serves as a practical workaround, functioning like the desktop moderator.
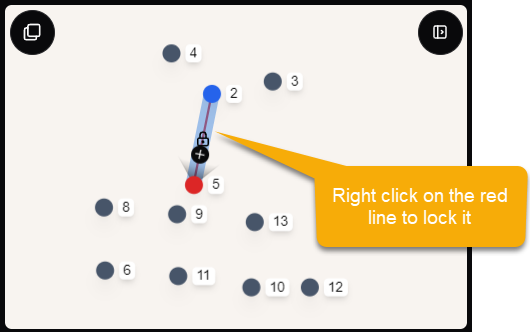
9. Right click on the new link on the map to close the connection.
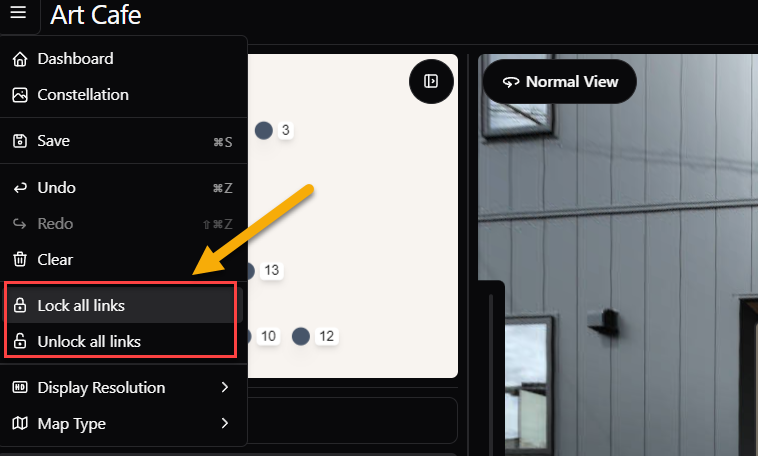
10. You can lock all or unlock all the connection at once. You have the flexibility to either lock all connections or unlock all connections simultaneously, providing you with efficient control over the constellation in case you need to rotate or move it.
11. Continue the moderation process by finding the next panorama in the unconnected images.
12. If needed, you can reposition the constellation on the map by selecting and dragging it or rotating it according to your requirements.
13. Once all panoramas are linked, click "Save" in the top left corner to complete the moderation process.
Tips:
Preview the constellation to inspect its correctness. Keep in mind that the preview has lower speed and image quality since it's not the final tour. However, it's useful for verifying the constellation.
Adjust the transparency level of the upper-level panorama by pressing keys from 1 to 9 on your keyboard while positioned on the image.
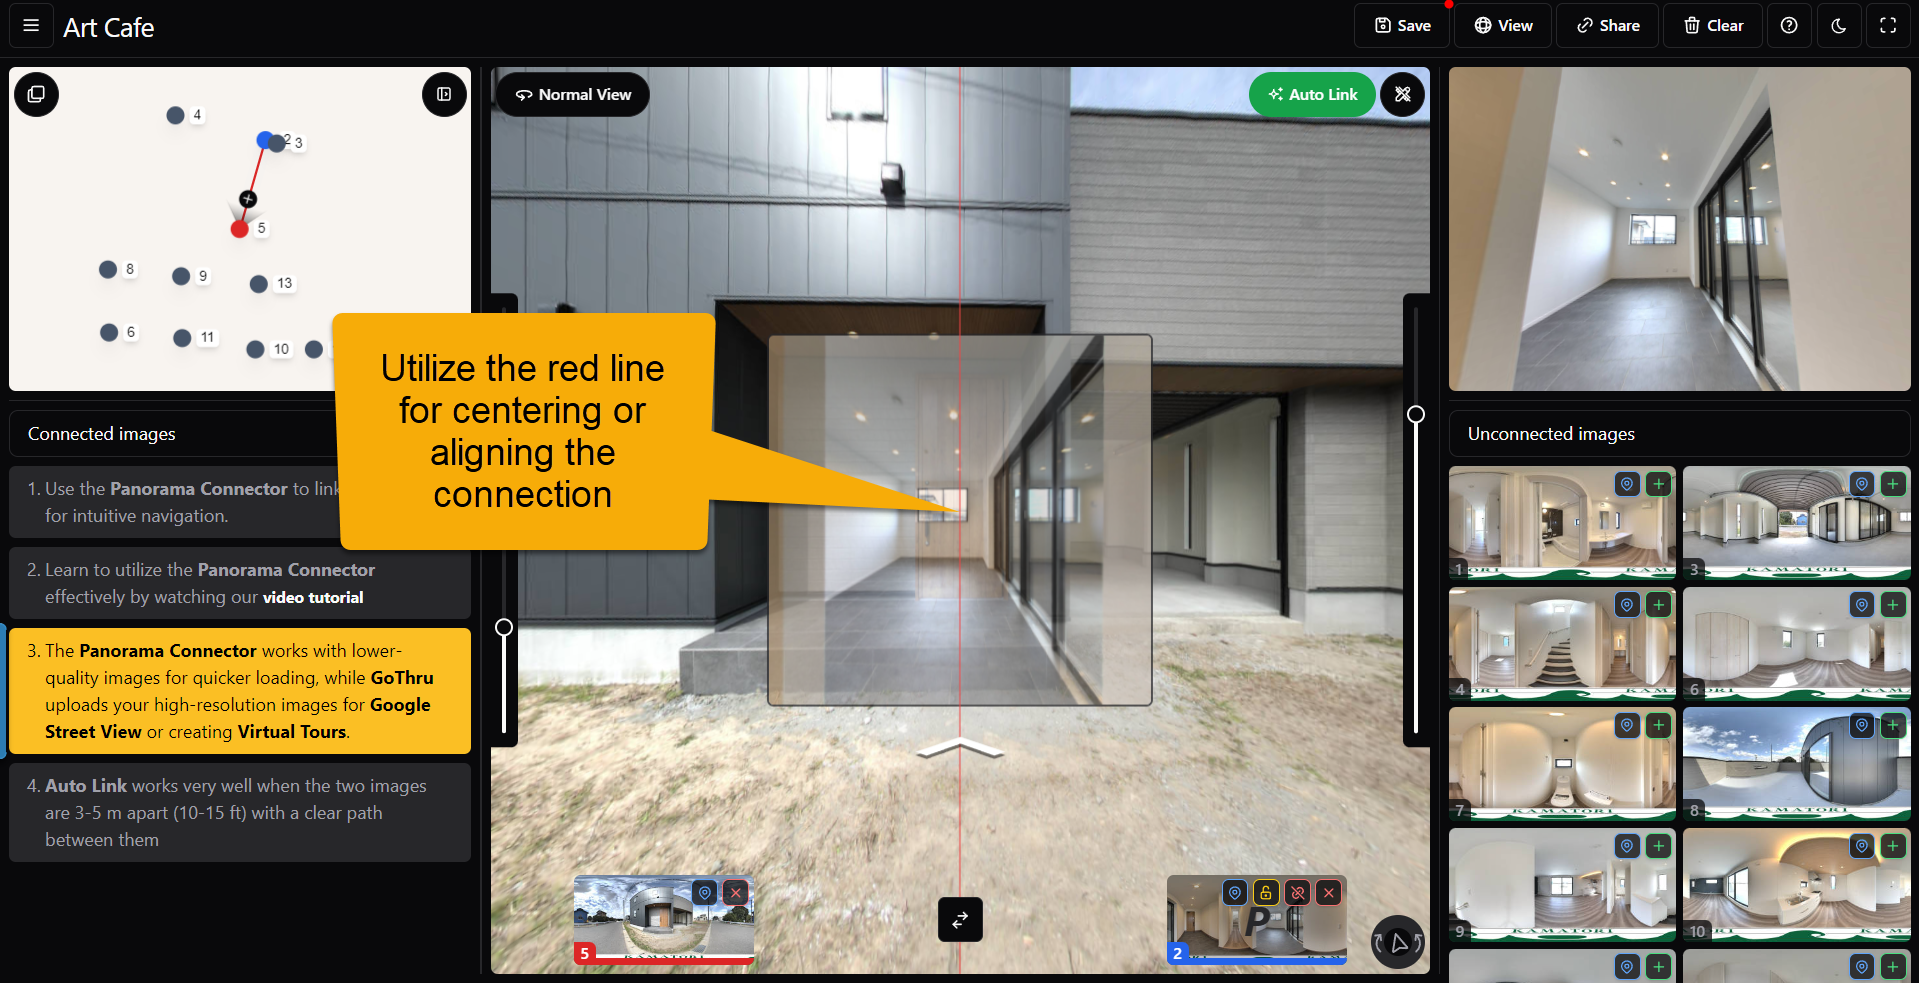
Use the "Q-Key" to automatically correct the panorama angle if it's not pointing in the right direction. Set the red line where the link should point and press "Q" to align the panoramas correctly.