How to Create an Immersive Virtual Tour Using GoThru's Tour Editor
A Step-by-Step Guide for Stunning Virtual Experiences
1️⃣ Getting Started
Before You Begin
✅ Prepare Your 360° Images
- Minimum resolution: 5300x2650px
- Supported format: .jpg
2️⃣ Create a New Tour
- Go to GoThru Dashboard → Click "Create New Tour"
- Select: "Create Virtual Tour Using Virtual Tour Editor"
- Choose a name (e.g., "Beer Store 2022 Tour")

3️⃣ Upload & Connect Images
Option A: Direct Upload
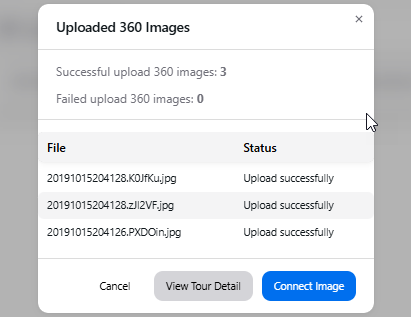
- Click "Browse Files" or drag/drop images into the upload zone
- Wait for confirmation (e.g., "3 images uploaded successfully")
Option B: Import from Cloud
- Use Google Drive or Dropbox for bulk uploads
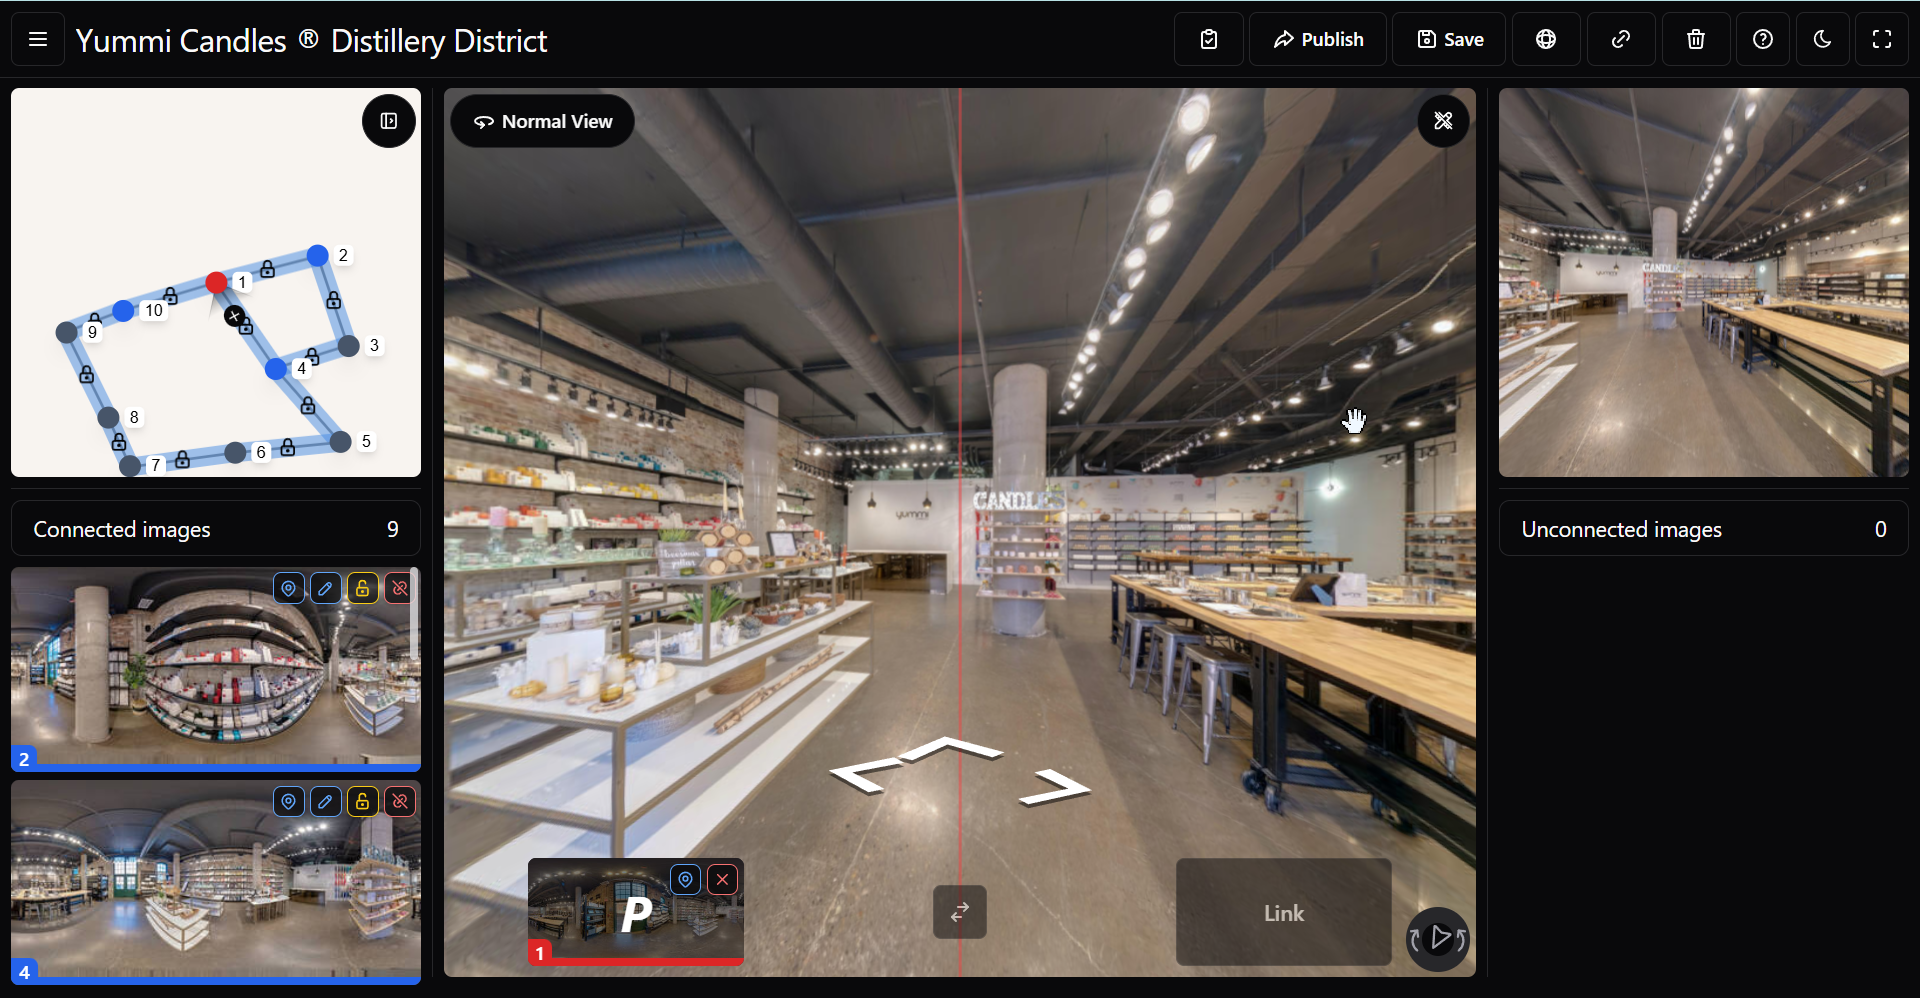
4️⃣ Link Images in the Tour Editor
Open the Panorama Connector:
- Double-click your first image (e.g., "Entrance Plaza")
Add Subsequent Images:
- Drag/drop or double-click adjacent panoramas
Use Auto Link:
- Click "Auto Link" to let AI connect images
- Manually adjust paths if needed
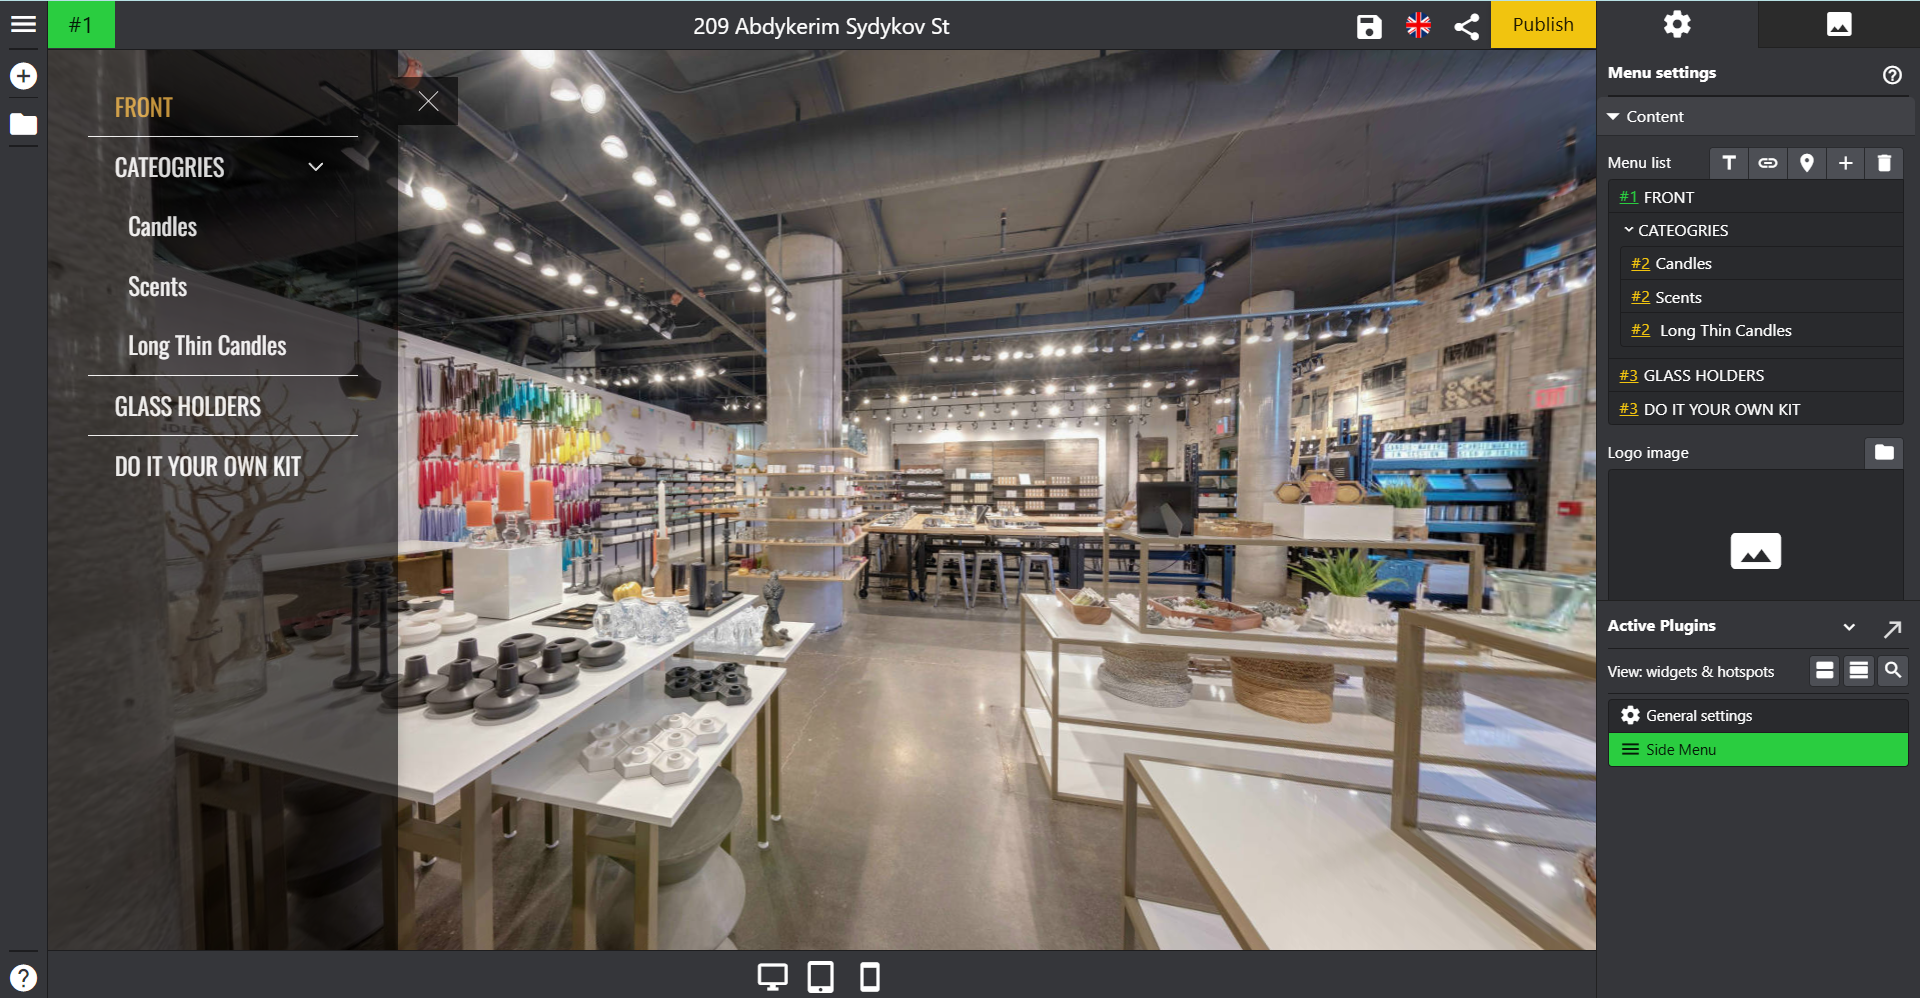
5️⃣ Customize Your Tour
Open the Virtual Tour Editor To start customizing your tour, open the Virtual Tour Editor. This opens in a separate screen and includes tools for adding interactive elements and branded plugins.
Key Features
- Menu: Enable side menus/control bars for user-friendly browsing
- Hotspots: Add clickable info points (e.g., "Tap to explore the bar area")
- Map or Floor Map: Add an interactive mini map or floor plan for better orientation
- Control Bar: Add navigation tools for easier movement inside the tour
- Carousel Slider: Add an image carousel slider for quick scene selection and immersive flow
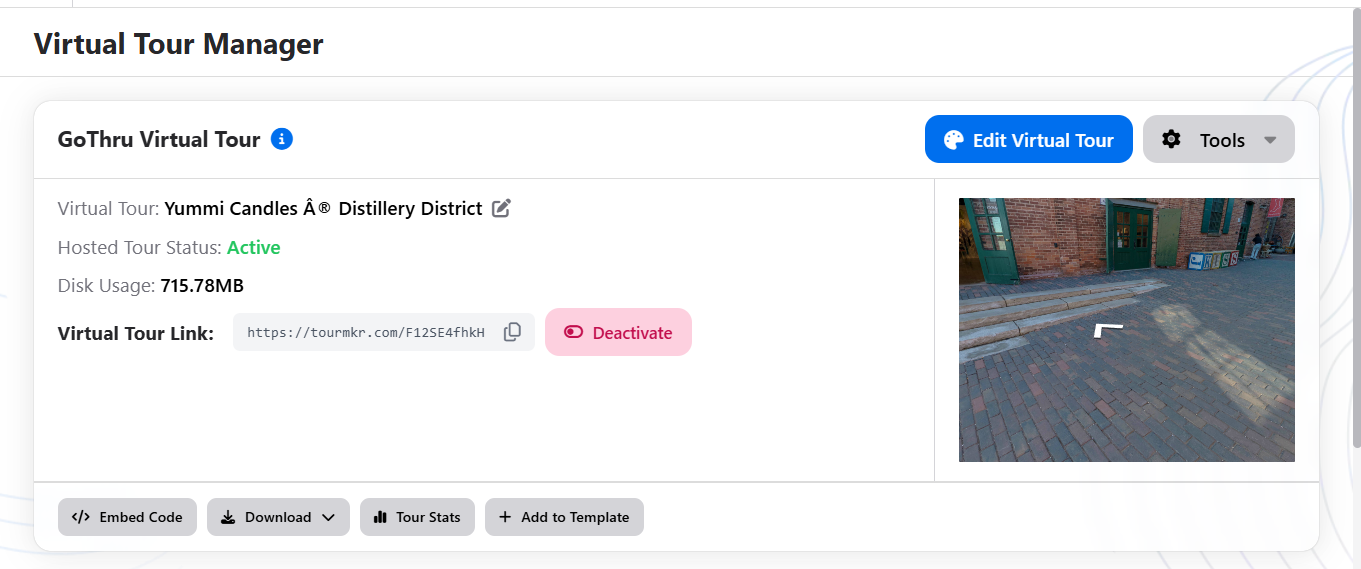
6️⃣ Activate Your Hosted Tour
This is a hosted tour — no need to publish to Google. Simply activate the shareable link, which costs $35 per year per tour.
✅ If you're on the PRO plan, hosted tour activation is unlimited and included within your subscription.
You can also generate an embed code to integrate the tour into your website.